
In
this
article,
we
explain
how to
create
and
set up
a
pop-up
in
Elementor.
This
could
be a
regular
pop-up (usually
showcased
in
the
middle
of
the
screen,
of
left
side
corner) or
a
fly-out
panel (which
slides
in
after
clicking
a
label)
Examples
1. Create Pop-up
- Log in to
WordPress
and
navigate
to Templates
>
Popups
- Press
‘Add
New‘
in the
upper left
corner
- Choose Pop
Up and
fill out a
name for
your pop
up.
Press CREATE
TEMPLATE:

- Open
Elementor
by
pressing
‘Edit
with
Elementor‘
2.
Update Content
2.1 Settings –
Measurements
& Position
- Once in
Elementor,
the
following
screen
shows.
Press Settings in
the left
corner
below your
screen:

- For a general pop-up, you can update these settings after you have inserted and created the content of the pop-up. In that way, you can adjust it to the size needed to display all info nicely. Usually:
- Height: Fit to Content
- Width: 500 or bigger
- Position: for an exit popup, always put in the middle of the screen to make sure the visitor doesn't miss it. If it's an entrance popup, we recommend to set it at the left or right bottom, so the visitor doesn't click it away straight away. You can also choose to show this one in the middle of the screen, but this might lead to a higher close-rate.
- For a fly-out panel; it is recommended to update the settings to the below:
- Breedte: 400
- Height: Fit to Screen
- Position: On the right and in the middle
- Entrance
and
Exit
animation: Slide in / out

- Breedte: 400
- Navigate to the nine-dots-icon on top of the pop-up, and click on this.

- In the menu that now shows on the left side > ‘Edit section’ > Click on the Style-tab.

- For Type
Background,
choose the
pencil-icon.
Below
Afbeelding/Image,
you can
select the
image you
wish to
set as the
background
for your
pop-up/fly-out. Note:
make
sure
you
have
already
cropped
the
desired
image
on
your
computer
so it
will
kind
of
match
the
size
of the
fly-out
or
pop-up.
- Note: If
you want
to create
a pop-up
with an
image
field,
rather
than using
an image
as a full
background,
you can
skip the
last step
and insert
an
Image-/Afbeelding-widget
in the
next
chapter.
2.2
Create Content
- Now you can drag ‘n drop the items you need, inside the pop-up. Normally you will need these widgets as the base:
- Titel
/
Title
- Tekstbewerker
/
Paragraph
- Knop
/
Button
- Afstandhouder
/
Spacer

- Titel
/
Title
- After you
have
dragged
all the
needed
widgets to
the
pop-up,
you can
adjust
these
items
accordingly. Note:
to
match
the
styling
used
throughout
the
website,
you
might
need a
marketing
executive/consultant
or
developer
to
help
you
out a
bit.
- You can
link the
button to
an
internal
page or
booking
engine.
Read here
how if you
don’t know
already: How to Add a (External or Internal) Link or Anchor Link
- After all
is set,
you press
the
green UPDATE-button in
the left
corner
below.
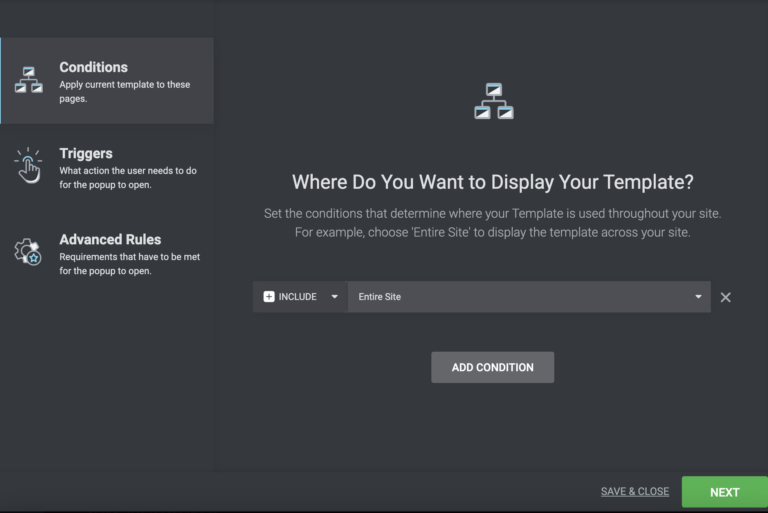
- For display
conditions (the popup that will show after pressing UPDATE), make sure
it is set
at ‘Entire
Site‘.
- The other
steps you
can skip
and
press SAVE
&
CLOSE.
3. Add Email (Marketing) Field
4. Set up the popup conditions
- Select the Entire site and click on next
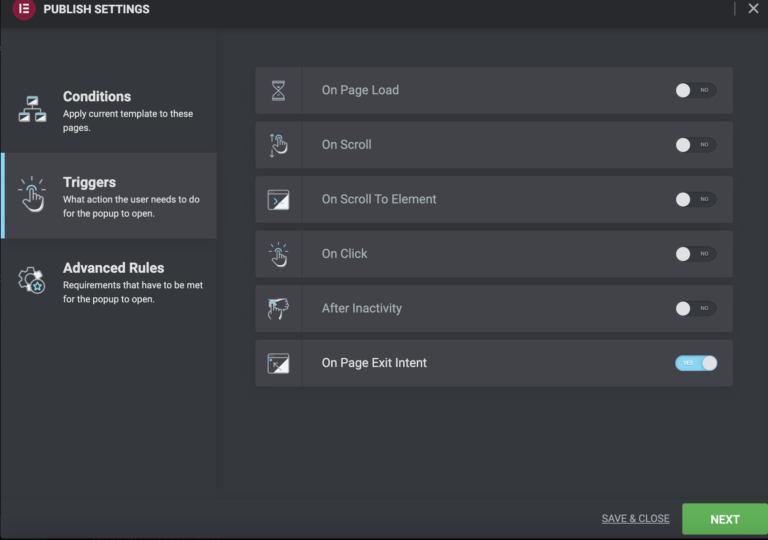
- Enable
the on
page
exit
intent option
and click
on
next
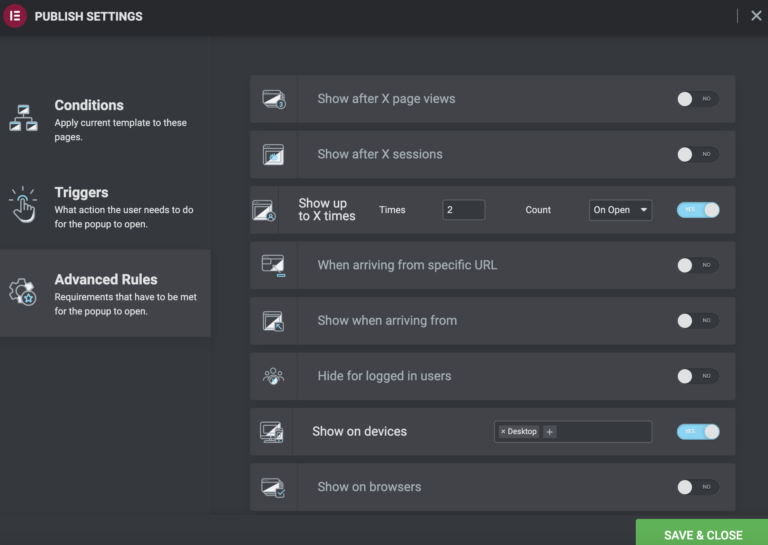
- Enable the show up to X times option and set it up to 2 times
Save
and
you
are
good
to
go!